I’ll be honest with you — I’ve designed and lived in enough kitchens to know that looks can be deceiving. A few years ago, I helped my sister redesign her kitchen. On paper, it looked perfect: beautiful quartz counters, fancy backsplash, and sleek cabinets. But three months later she was complaining constantly. She had to take five steps just to get from the fridge to the cutting board, the island blocked the main walkway during dinner rush, and half her cabinets were basically unreachable without a step stool.
That experience taught me something important: a kitchen that looks good but doesn’t work well becomes a daily source of irritation. In 2026, with so many of us spending more time at home cooking, working, and gathering, function matters more than ever.
This guide is for anyone who wants a kitchen that actually makes life easier — whether you’re remodeling, building new, or just dreaming about changes. No fluff, just practical advice I wish someone had given me earlier.
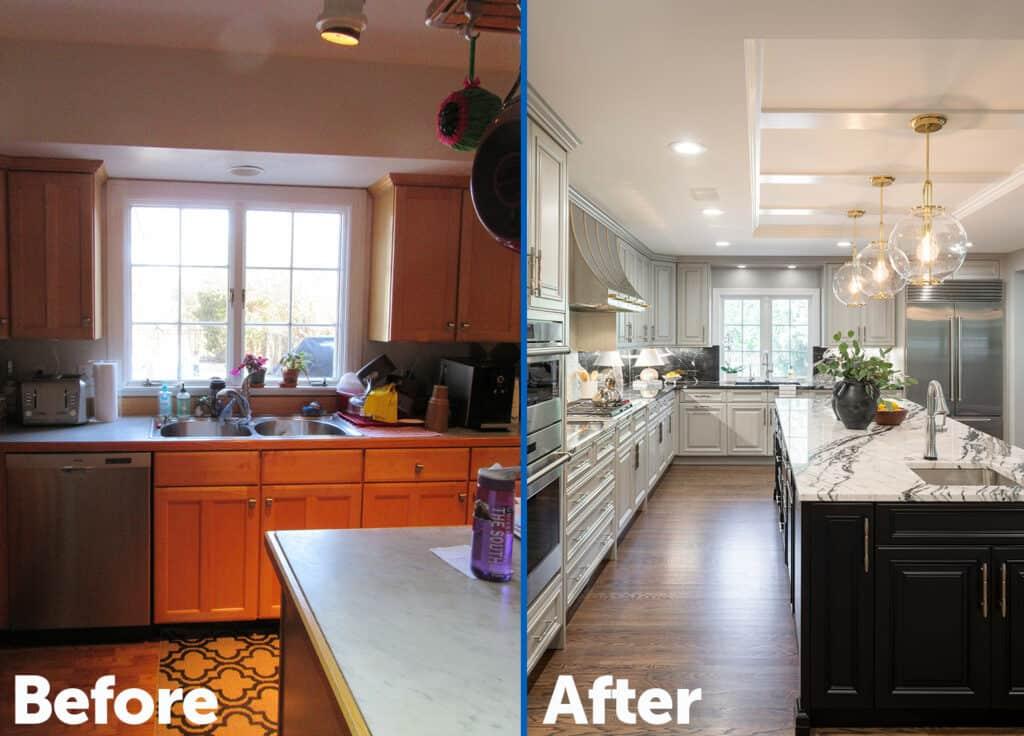
Understanding the Foundation: The Work Triangle and Modern Work Zones
The classic “kitchen work triangle” — connecting the refrigerator, sink, and stove — has been around for decades for good reason. It’s all about minimizing unnecessary movement while cooking. The general rule is that each leg of the triangle should be between 4 and 9 feet long, with the total perimeter under 26 feet.
But here’s the thing: in 2026, many designers have evolved this idea into work zones. Instead of obsessing only over three points, think about your kitchen as a series of stations that support real-life cooking:
- Storage Zone: Fridge, freezer, and pantry
- Prep Zone: Main counter space for chopping, mixing, and assembling
- Cooking Zone: Stove, oven, and range hood
- Cleaning Zone: Sink, dishwasher, and trash/recycling
- Serving Zone: Area for plating food and storing dishes
When these zones flow logically into one another, you stop wasting time and energy. I’ve seen kitchens where the prep area was far from the fridge — meaning someone was constantly walking back and forth with armfuls of ingredients. Small changes in layout can eliminate that frustration completely.
Choosing the Right Kitchen Layout for Your Lifestyle
No single layout is perfect for everyone. The best choice depends on your space, family size, cooking habits, and how you entertain.
U-Shaped Kitchens
This layout is my top recommendation for most families. With counters and cabinets on three walls, you get maximum workspace and storage. The workflow feels natural — you can pivot easily between zones without long treks across the room.
The potential downside is that it can feel enclosed. To fix this, I recommend keeping at least one side open to the rest of the house or adding large windows above the counters. Many people also add a breakfast bar on the open end for casual seating. In medium to large kitchens, a U-shape gives you that efficient “everything within arm’s reach” feeling that serious home cooks love.
L-Shaped Kitchens
Extremely versatile and popular in open-concept homes. One long counter run meets another at a right angle. This creates a natural separation between the cooking area and living space while still allowing conversation.
I especially like adding a large island opposite the L to create even more prep space and seating. This layout works beautifully in homes with kids because you can keep an eye on the family while cooking. Just be careful with traffic flow — make sure the main pathways don’t cut through your main work areas.
Galley Kitchens
Don’t underestimate these for smaller homes or apartments. Two parallel counters create a highly efficient workspace. Many professional chefs actually prefer galley layouts because everything is close at hand.
The key to success here is generous spacing — at least 4 to 5 feet between the two sides so two people can pass comfortably. Use light colors, good lighting, and smart storage to prevent it from feeling narrow or dark.
Kitchen with Island
Almost everyone wants an island these days, and for good reason. A well-designed island can serve as extra prep space, casual dining, homework station, and storage all in one.
However, I’ve seen too many kitchens where people crammed in an island that was too big for the room. My advice: make sure you have at least 42–48 inches of clear walkway around all sides. Consider putting the sink or cooktop on the island if you want to face the room while working. In 2026, many islands are also incorporating charging stations and built-in outlets.
Open-Concept Kitchens
These layouts promote family connection and are great for entertaining. But they come with challenges — cooking smells travel fast, and visual clutter is obvious to guests.
If you go open, plan for a powerful range hood and think about ways to create gentle separation, like a half-wall, tall storage units, or different flooring materials. Many families find a balance with a large island that acts as a buffer zone.
Mastering Storage: Making Every Inch Count
Poor storage is the silent killer of kitchen happiness. You need accessible, logical homes for everything.
Start by evaluating what you own. Be honest — do you really need 12 mixing bowls? Once you declutter, focus on smart systems:
- Drawers instead of doors: Deep pull-out drawers for pots, pans, and heavy items are game-changers. No more bending down and searching in the dark.
- Corner solutions: Lazy Susans or modern pull-out corner systems turn dead space into useful storage.
- Vertical space: Tall pantry cabinets, wall-mounted racks for utensils, and cabinets that go all the way to the ceiling (with a library ladder if needed).
- Specialized organizers: Pull-out spice racks, baking sheet dividers, under-sink cleaning caddies, and knife blocks built into drawers.
- Everyday accessibility: Keep daily dishes, glasses, and snacks between waist and shoulder height. Reserve high and low spaces for rarely used items.
One of my favorite recent trends is integrating small appliance garages — hidden counters where you can store and use your toaster, coffee maker, and stand mixer without cluttering the main counters.
Workflow Tips That Save Time and Sanity
Good workflow is about more than layout. It’s the little things:
- Position the dishwasher right next to the sink for easy loading.
- Create a “landing zone” counter next to both the fridge and oven.
- Place frequently used items where they’re most logical — oils and spices near the stove, cutting boards near the prep area.
- Think about your dominant hand when deciding swing direction for doors and placement of handles.
- Add plenty of electrical outlets, including USB charging ports. In 2026, this is basically non-negotiable.
Lighting is another huge factor. Combine bright overhead lights, under-cabinet task lighting, and decorative pendants. Good lighting prevents shadows on your workspace and makes the kitchen feel welcoming at night.
Materials, Finishes, and 2026 Trends
While function comes first, smart material choices support long-term usability. Quartz countertops remain popular because they’re durable and low-maintenance. For flooring, consider luxury vinyl plank or porcelain tile — both handle spills and heavy traffic well.
In 2026, we’re seeing more integration of smart features: voice-activated lighting, app-controlled appliances, and even refrigerators with built-in screens. However, don’t get distracted by gadgets if the basic layout doesn’t work.
Common Mistakes and How to Avoid Them
Over the years, I’ve seen (and made) plenty of mistakes:
- Choosing aesthetics over practicality — that gorgeous but awkward island
- Insufficient counter space on either side of the sink and stove
- Poor lighting design that leaves you working in shadows
- Cheap hardware that fails quickly
- Ignoring family traffic patterns, especially with kids and pets
- Forgetting future needs — like space for aging in place or additional family members
The best way to avoid regret is to mock up your layout with painter’s tape on the floor and walk through cooking scenarios.
Step-by-Step Process for Designing Your Kitchen
- Observe your current habits for a week and note frustrations.
- Set a realistic budget (include 10-15% contingency).
- Hire professionals for measurements and technical plans.
- Prioritize layout and storage before picking pretty finishes.
- Get multiple quotes and check references.
- Live with a 3D rendering or mockup before final decisions.
Final Thoughts
A truly functional kitchen becomes one of the most loved spaces in your home. It quietly supports your routines, reduces daily stress, and brings people together. When the layout works, you’ll find yourself cooking more often, enjoying the process, and creating memories instead of fighting with the space.
Take your time with this project. Stay focused on how you and your family actually live. In the end, the best kitchens feel personal, intuitive, and full of life — not just beautiful on Instagram.
If you’re in the middle of planning your own kitchen right now, I’d love to hear what challenges you’re facing. Is it a small space, awkward layout, tight budget, or something else? Drop your questions below and I’ll try to offer some specific suggestions.

Karl Hunter is a professional writer, researcher, and digital content strategist dedicated to producing well-researched, engaging, and informative content. With a passion for simplifying complex topics, Karl specializes in creating articles that help readers make informed decisions across business, finance, technology, education, and nonprofit initiatives.